An Opinionated Guide toTyping in Na’vi
BackFollow these steps to enable the “US (International)” keyboard layout:
1. Open the Settings.
Press the Super (= Windows) key and search for “settings“ to find it.
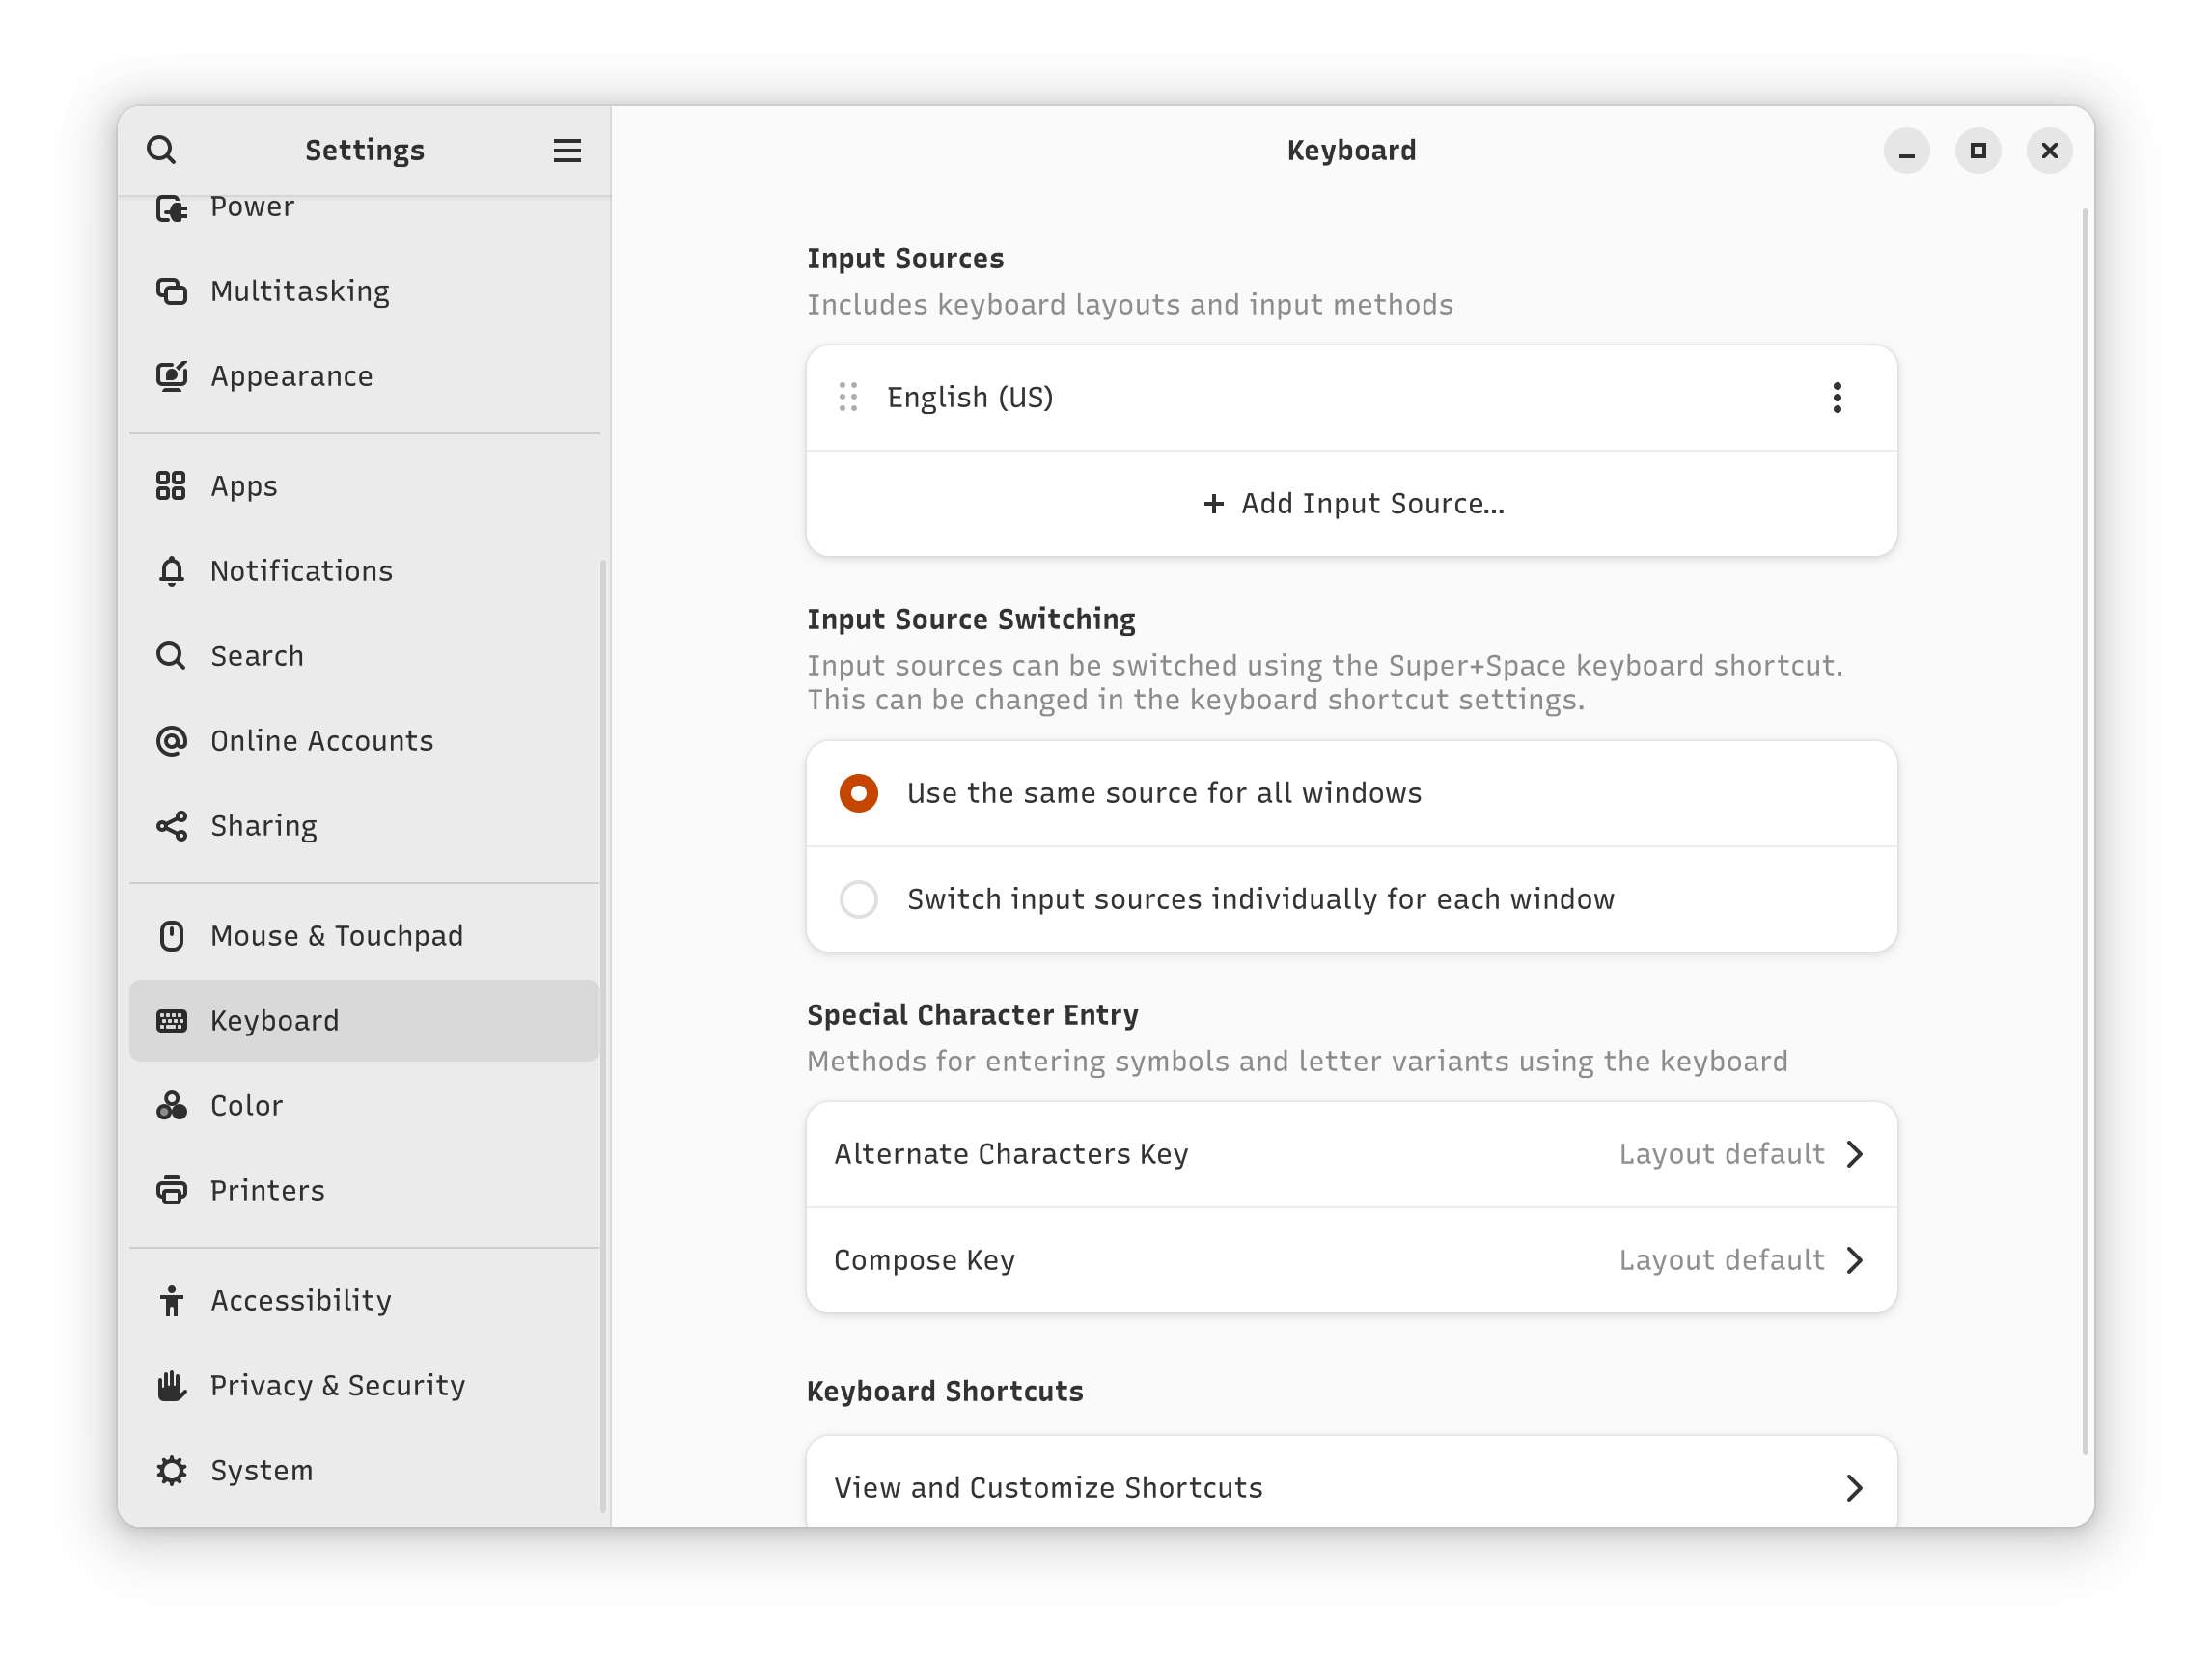
2. Click “Keyboard“ in the sidebar, and under “Input Sources”, click “Add Input Source…“.
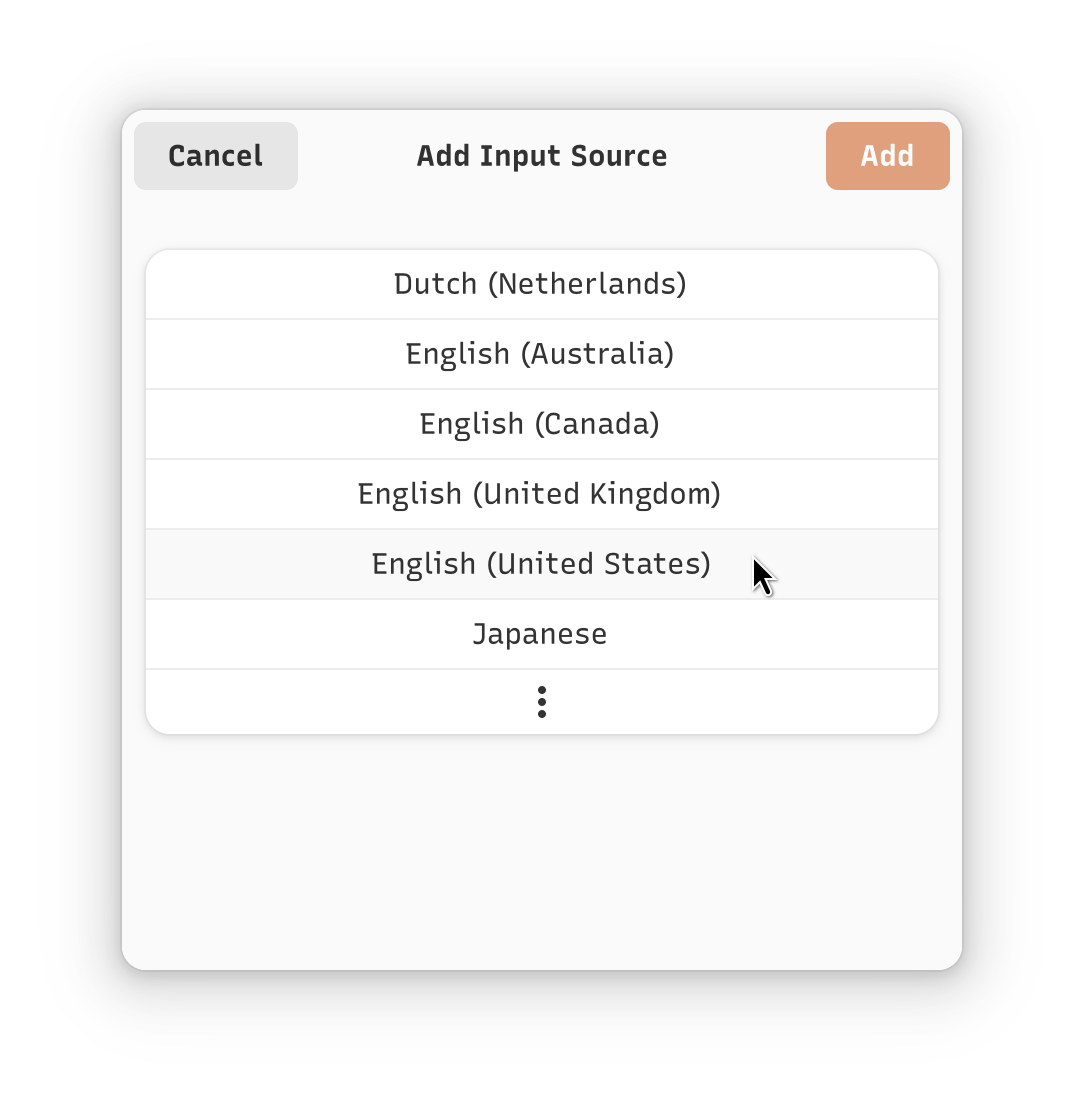
3. Select “English (United States)”.
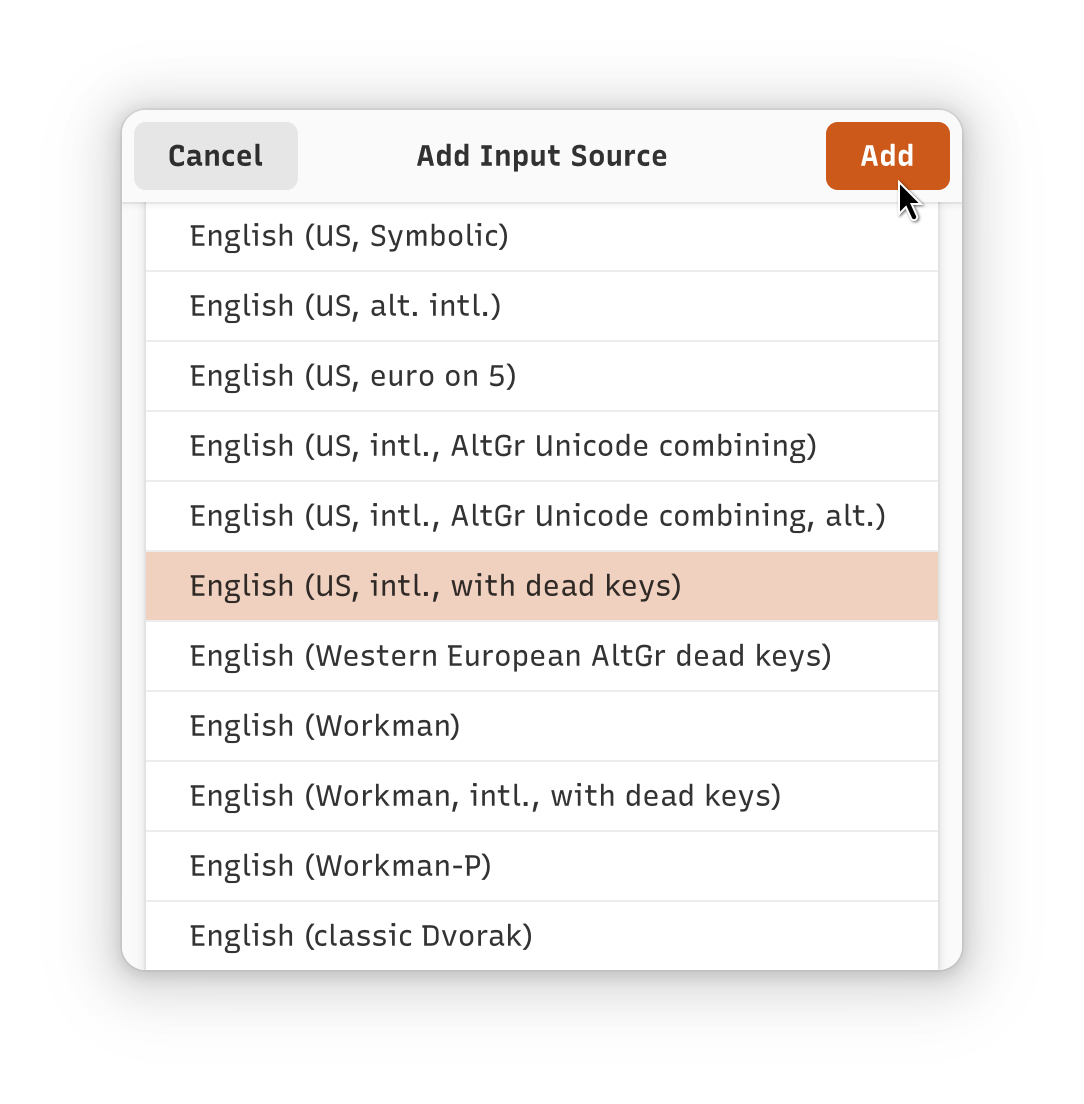
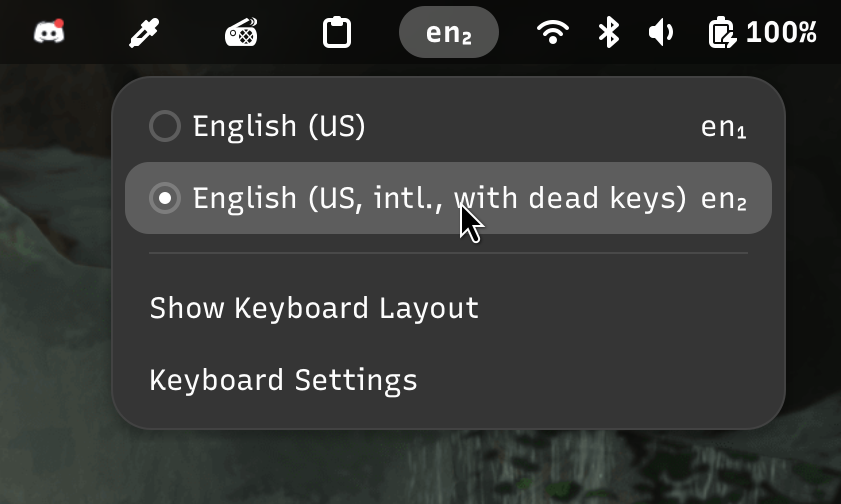
4. Select “English (US, intl., with dead keys)“ and click “Add”.
5. Switch to the layout by picking it in the keyboard layout switcher.
You can find this menu in the top-right corner of the screen.
Congratulations, you can now type in Na'vi!
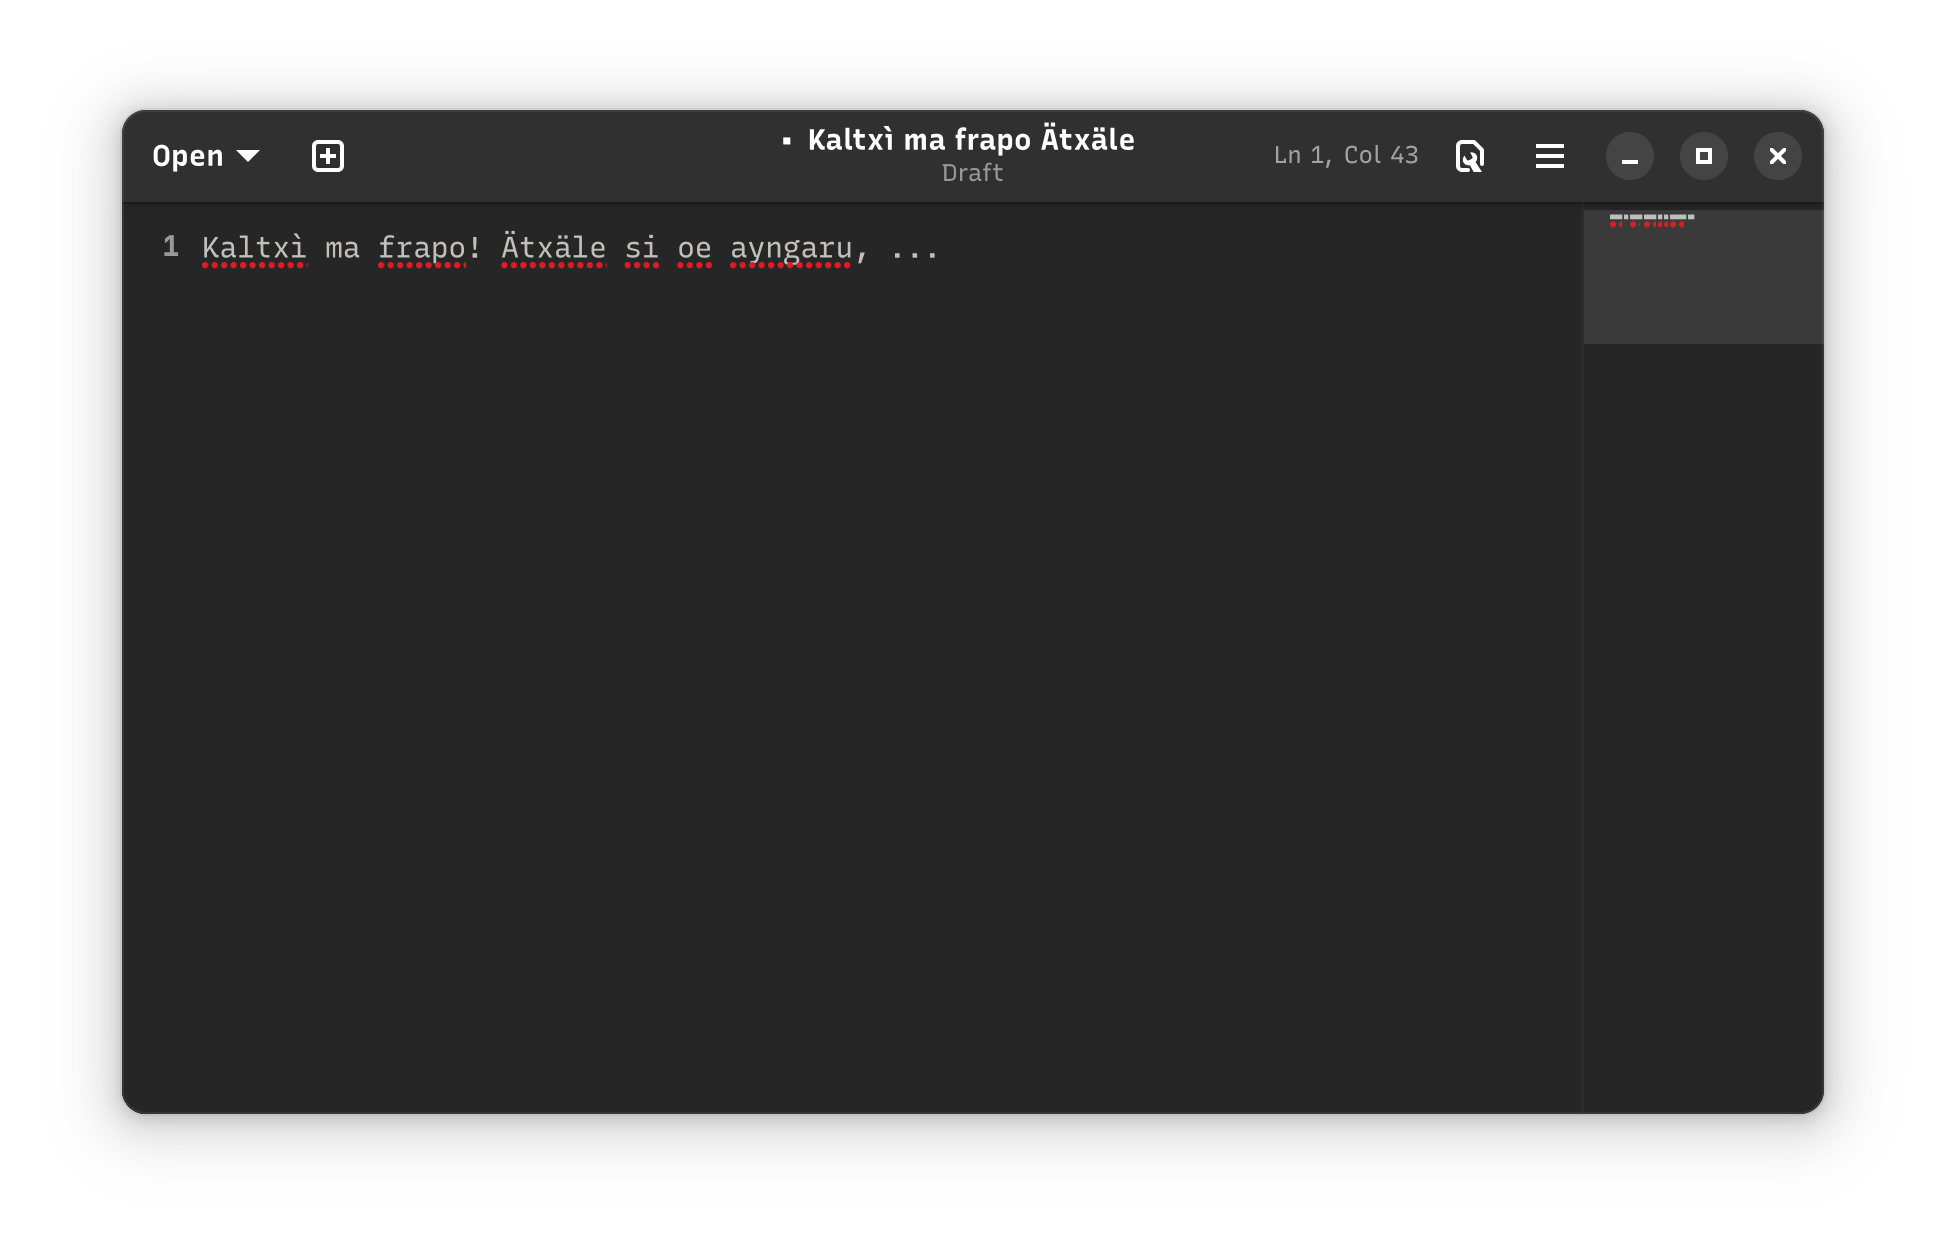
To type accented letters, you first type the accent and then the base letter. So:
- To type ä, press and release Shift + ' and then press A.
- To type ì, press and release ` and then press I.
- To type é, press and release ' and then press E.
- To type ù, press and release ` and then press U.
- To type the uppercase variants of these, just add Shift to the base letter.
- To type ', press and release ' and then press Space.
Want to go back?
If you're not happy with this keyboard layout, you can easily switch back to your old one using the keyboard layout switcher (see Step 5). You can also completely remove the newly added keyboard layout by going to “Keyboard“ in the Settings, clicking the three-dots icon behind “English (US, intl., with dead keys)”, and clicking “Remove“.